In WriteMapper, you can use mind maps to chart the direction of your writing, creating a content structure that's logical and flows well.
HERE, WE'LL BE using the mind mapping interface WriteMapper provides to create an outline of what you want to write about.
After putting down the working topic title, you can create cascading branches of subtopics, expanding on the subject to the level of detail you desire, as well as arranging the flow of the document you're creating.
Listed below are the features that support this outlining process.
There are three layouts in which you may display your mind map, to differing visual effect. Let's go over each of the mind map layouts available in WriteMapper.
To show the default layout, press the Cmd/Ctrl+1 keyboard shortcut, or select the Linear Layout option shown in the the View menu in the toolbar.
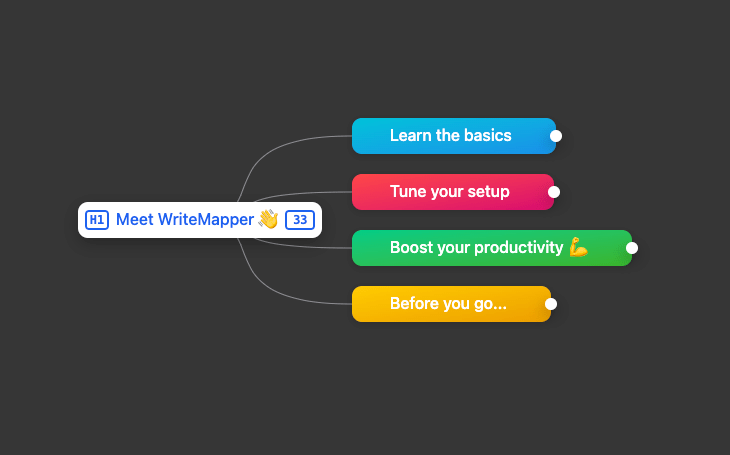
This layout displays nodes branching out from left to right in a linear fashion.
To show the default layout, press the Cmd/Ctrl+2 keyboard shortcut, or select the Nested Layout option shown in the the View menu in the toolbar.
Each child node is nested under its parent node in this layout, making for a structure that closely resembles a list outline — as shown in the image above.
To show the default layout, press the Cmd/Ctrl+3 keyboard shortcut, or select the Sprawl Layout option shown in the the View menu in the toolbar.
In this layout, the mind map branches out to both left and right like you would have in a traditional mind map drawn on paper.
You may also configure the default layout your new WriteMaps should use, by going to Menu Bar → Settings → General tab → WriteMap → Default Layout, and choosing from "Linear", "Nested", or "Sprawl".
Having color-tagging abilities baked into the app helps you organize and categorize the ideas in your WriteMap, while also bringing with it a splash of delight to help make writing more interesting and engaging.
How To Change Node Colors
Change the color of any node by right-clicking it and then selecting the desired color from the "Color Tag" menu option. The menu will allow you to choose whether to only affect only that node, or if it has children, whether to also include them.
You can also change the color tag of a node from the toolbar, using the middle toolbar button when in the content editor.
Categorize Node Colors
This is a feature that allows you to instantly color-organize your mind map. To trigger it, right-click the root node in your mind map, and click Categorize Node Colors. The result you'll see is each H2-level node will be assigned a randomly chosen color tag.
Editor Accents
Besides having a visual effect from the WriteMap view, node color tags also have an effect within a node's content editor.
Accent colors for special formats such as inline code and highlighted text make use of the node's color tag, subtly reminding you which part of your writing project you're currently working in.
Random New Node Color
You may have also observed that when you create new H2 nodes, the app automatically applies a random color to it. You may disable this behavior from the Settings menu, under the General tab, by changing the "Random New Node Color" setting.
Default Node Color
Also under the General tab in the Settings window lies the "Default Node Color" setting. Changing this will modify the root node's color for new WriteMaps you create. This setting also affects the color of the "Create" button shown in the initial screen shown after opening WriteMapper.
Use In Export Filters
Tip: Export filter settings may be found in the Settings window, within the "Export" tab, and under the "Selection Filters" heading.
Color tags are also used as part of export filter settings, whereby you may designate nodes of certain colors to be included or excluded as part of your exported document, giving you another dimension by which to use color tagging organize your writing.
Using keyboard shortcuts can help boost your writing productivity. WriteMapper has integrated keyboard shortcuts as part of its core functionality, so most actions you'd want to perform in the app has a corresponding shortcut you can use.
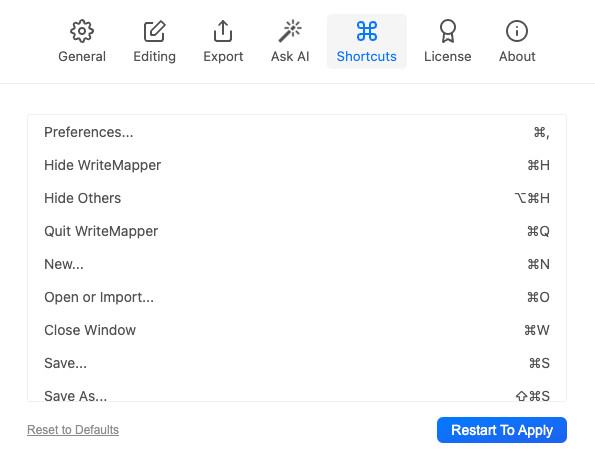
You may view all of WriteMapper's keyboard shortcuts from within the WriteMapper app, by navigating to: Menu Bar → WriteMapper → Settings → "Shortcuts" tab. A full list of keyboard shortcuts provided by the WriteMapper app will be shown.
For further information about more keyboard shortcuts available, please refer to this support article on our website.
In that same shortcuts tab in the Settings window, you may customize these to use your preferred key combinations from this view as well.
While immersed in the content editor, you might find yourself writing a long list of sub-points, which you later want to pull out as separate child nodes in your WriteMap.
We've created a quick and easy solution to remedy this awkward situation for you to move text easily between the mind map and each node's contents.
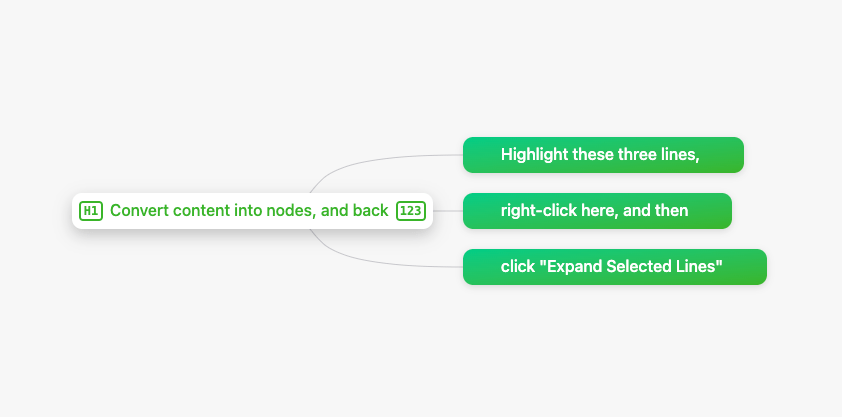
In the content editor, highlight the lines you want to turn into nodes. Right-click the text selection and choosing the "Expand Selected Lines" option will auto-magically turn those lines into their own nodes in the mind map.
We can even do this in the reverse direction. In the mind map view, for any node that has children, right-click it and choose "Absorb Children". The app will then pull the data found within those child nodes into the content editor of the right-clicked parent node.
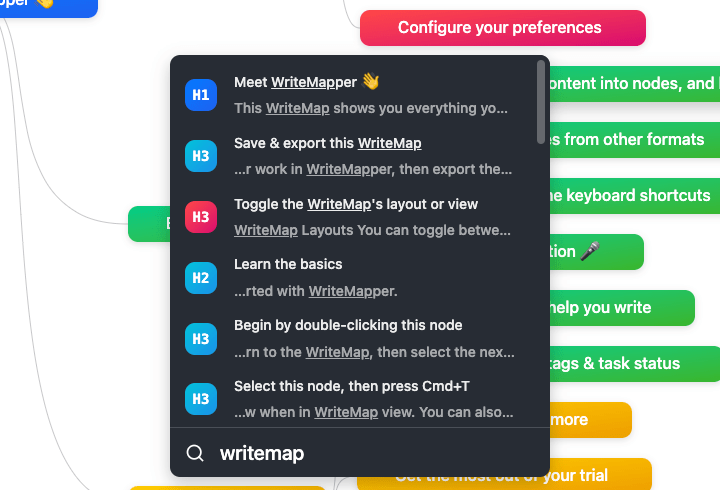
Search through all nodes and their contents in your WriteMap using a quick and efficient Quick Search interface, whether you're searching in the WriteMap, content editor, or document view.
Pressing the Cmd/Ctrl+F keyboard shortcut will be the quickest way to pull up the Quick Search interface from the current view you're in.
From there, begin typing your search query, and the search results will be shown as you type.
Searches are executed as soon as you type, and results are returned instantly, without any noticeable lag time.
Navigating Results
How the results are shown depends on the view you're searching from. If you're in the content editor, matching text gets highlighted in yellow.
If you're searching WriteMap-wide from the mind map or Document View, a list of search results appears that you can interact with to locate the matching result.
Sorting of Results
The results list shown to you is also sorted by the app, with results best matching your search query located higher up on the list.
Write in comfort day or night with WriteMapper's beautifully-designed dark mode interface.
You may configure the appearance the should the app adopt. For the Settings → General Tab → WriteMap → Appearance setting, setting it to Light or Dark will result in the app always being in those respective appearance modes.
Changing that same setting to System, however, will result in the app to always use the same Dark Mode setting as on your computer's operating system. You may additionally wish to refer to this guide from Apple and this post from Microsoft on how to set up dark mode on your operating system.
When in dark mode, WriteMapper makes subtle shifts in the hues of each color tag, so as to ensure that there remains sufficient contrast for each color to remain comfortably visible, adjusting to the day and night difference in background colors.
The Task Status feature helps you gain clarity on and keep track of what’s left to do, by letting you mark individual nodes as completed.
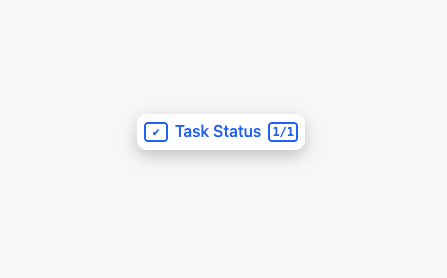
To toggle a node's task status from the WriteMap view, right-click it and select Toggle Task Status. A checkmark icon will display on the left side of the node's title, in place of its heading level information.
Remember, you can also use the tilde key ~ to view all node info at once.
Just like changing a node's color tag from the content editor, accessing the same toolbar button also lets you view and toggle the task status of the node.
Again, similar to how color tags are use in export filters, you can use a node's task status to determine whether they should be included or excluded from your final document export.
Under the Export tab in the Settings window, change the Task Status selection filter to a value appropriate for how you've set up your WriteMap's contents.
Now that you know how to create a content outline using WriteMapper's mind map interface, we can move on to the next part of the User Guide, which will cover writing each node's contents.
WriteMapper is a software tool that uses mind maps to help you skyrocket your writing productivity.
Learn More User GuideWriteMapper
Support
Use Cases
Toggle Dark Mode
Apple, the Apple logo, Apple Watch, iPad, iPhone, and iPod touch are trademarks of Apple Inc., registered in the U.S. and other countries. WriteMapper is a product of BETTERWEBPAGES.
© BETTERWEBPAGES 2017-2024. All rights reserved.